


The Simplest Toddler Sweater: A Beginner-Friendly Crochet Pattern
Are you looking for an easy, beginner-friendly crochet project that’s perfect for the little one in your life? Look no further than this adorable toddler striped sweater with a hood! This pattern, originally designed by Lorene Haythorn Eppolite of Cre8tion Crochet, truly lives up to its name as possibly “the simplest sweater pattern you’ll ever find.”
In this blog post, I’ll walk you through this delightful pattern with fully expanded instructions (no confusing abbreviations!) and plenty of tips to help you create a cozy, stylish sweater for your toddler.
What Makes This Sweater Perfect for Beginners
This toddler sweater pattern was designed with simplicity in mind. It features:
- Basic stitches that are perfect for beginners
- A straightforward construction method
- Versatile design that works for both boys and girls
- Customizable stripe pattern
- Cozy hood for extra warmth
- Button-up front for easy dressing
Whether this is your first garment project or you’re looking for a quick, satisfying make, this pattern is an excellent choice for crocheters of all skill levels.
Materials You’ll Need
For This Project:
- 2 skeins of worsted weight yarn in your choice of colors (the original pattern uses Red Heart With Love)
- 5.5mm (I) crochet hook
- Embroidery needle for weaving in ends
- Buttons for the front closure
- Stitch markers or scrap yarn for marking
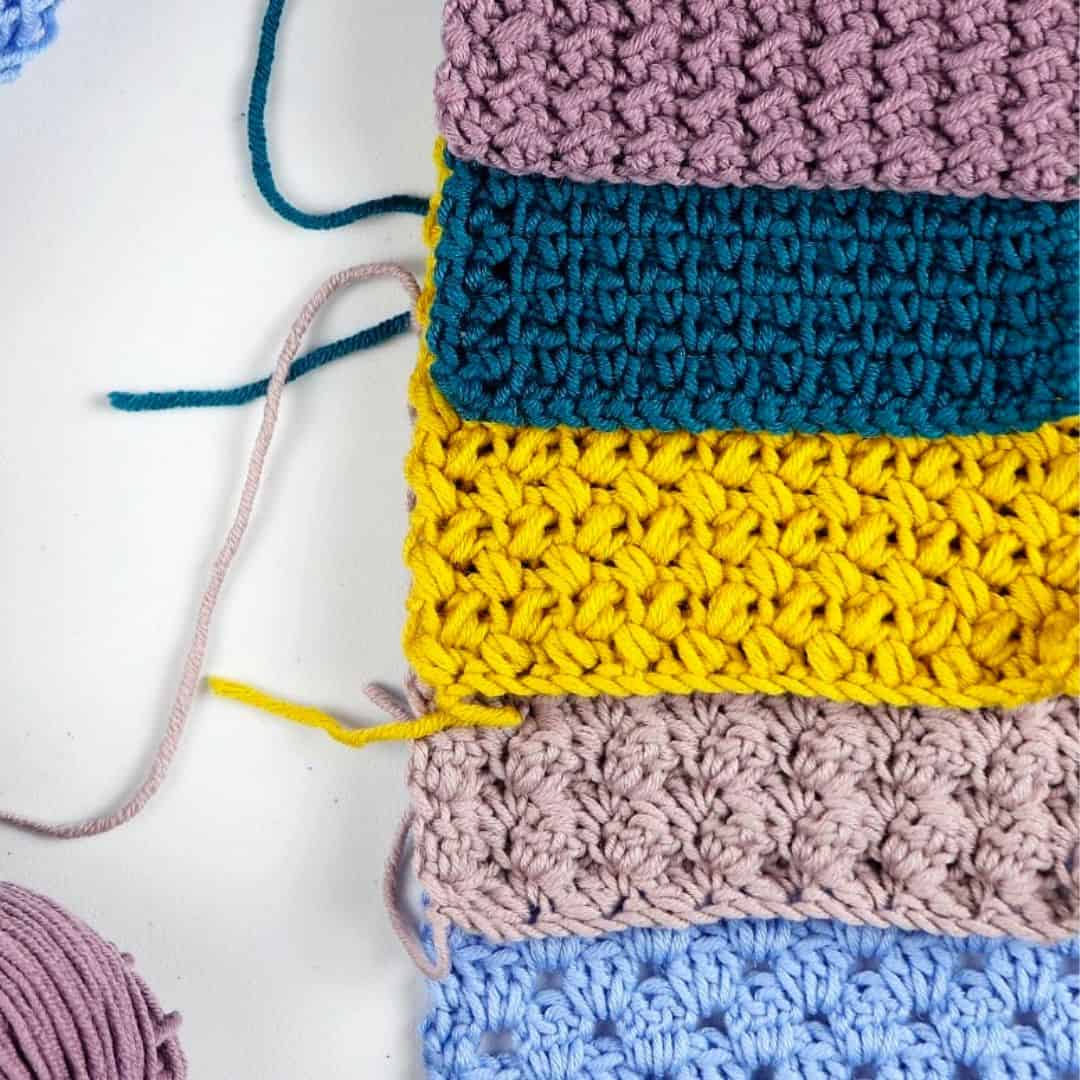
The beauty of this pattern is its flexibility—you can use any colors you like to create stripes, or even make the entire sweater in a single color. The original pattern uses multiple colors (grey, pink, blue, purple, and green) for a fun striped effect, but feel free to customize based on your preference or the yarn you have available.
Sizing Information
This pattern is designed to fit a toddler (approximately 2 years old) with room to grow. The finished measurements are:
- Sleeve length from armpit to cuff: 8 inches
- Neck opening: 7 inches wide (14 inches in diameter)
- Total wingspan: 30 inches
The original designer notes that it fits her 2-year-old daughter perfectly with room to grow, making it an excellent investment of your crocheting time.
Good to know: This pattern is now available in additional sizes including Baby (3m-18mo), Child (2y-12y), and adult sizes as well. If you’re looking to make this sweater in a different size, you might want to check the designer’s website for those options.
Understanding the Pattern
Before we dive into the step-by-step instructions, let’s clarify some of the terminology used in this pattern. I’ve expanded all abbreviations to make it easier for beginners to follow along.
Stitch Terminology
- Chain – The foundation of most crochet projects, created by pulling yarn through a loop on your hook
- Single crochet – Insert hook into stitch or space, yarn over and pull through stitch (two loops on hook), yarn over and pull through both loops on hook
- Double crochet – Yarn over, insert hook into stitch or space, yarn over and pull through stitch (three loops on hook), yarn over, pull through first two loops on hook, yarn over and pull through last two loops
- Foundation double crochet – A technique that creates both the foundation chain and the first row of double crochet stitches at the same time
- V stitch – A decorative stitch consisting of [1 double crochet, chain 1, 1 double crochet] all in the same stitch
- Double crochet two together – A decrease stitch that turns two double crochets into one stitch
- Slip stitch – Insert hook into stitch or space, yarn over and pull through stitch and the loop on your hook
Step-by-Step Instructions
This sweater is worked in one piece, starting from the bottom up. The sleeves are added later, and then the hood is created. Let’s break it down into manageable sections.
Body of the Sweater
Step 1: Starting with your first color (Color A), make a foundation double crochet of 56 stitches. Change to your second color (Color B) at the end of this row.
Note: If you’re not familiar with foundation double crochet, you can also chain 58 and then work double crochet in the third chain from the hook and in each chain across (56 double crochets total).
Step 2: Chain 3 (this counts as your first double crochet in every row) and turn. Work 1 double crochet in each of the next 9 stitches. Work a V stitch in the next stitch (1 double crochet, chain 1, 1 double crochet in the same stitch). Work 1 double crochet in each of the next 6 stitches. Work a V stitch in the next stitch. Work 1 double crochet in each of the next 20 stitches. Work a V stitch in the next stitch. Work 1 double crochet in each of the next 6 stitches. Work a V stitch in the next stitch. Work 1 double crochet in each of the remaining 10 stitches. You should have 52 double crochets and 4 V stitches.
Step 3: Chain 3 and turn. Work 1 double crochet in each of the next 10 stitches. Work a V stitch in the chain-1 space of the previous row’s V stitch. Work 1 double crochet in each of the next 8 stitches. Work a V stitch in the next chain-1 space. Work 1 double crochet in each of the next 22 stitches. Work a V stitch in the next chain-1 space. Work 1 double crochet in each of the next 8 stitches. Work a V stitch in the next chain-1 space. Work 1 double crochet in each of the remaining 11 stitches. Change to your third color (Color C). You should have 60 double crochets and 4 V stitches.
Continue in this pattern, increasing the number of double crochets between V stitches in each row. The V stitches create the increases that shape the sweater. Follow the color changes as specified in the pattern or create your own color pattern.
Color Change Tip: To change colors at the end of a row, begin your last double crochet. After the first yarn over and pull through, you will have two loops remaining on your hook. Pull up the new color and draw through the last two loops on your hook. Tie the tails tightly.
Creating the Armholes
Step 11: After completing row 10, you’ll create the armholes. Chain 3 and turn. Work 1 double crochet in each of the next 18 stitches. Work 1 double crochet in the chain-1 space (mark this stitch with a stitch marker). Chain 1 and skip the next 24 stitches, fold the piece in half and work 1 double crochet in the next chain-1 space (mark this stitch). This space will become your first armhole. Work 1 double crochet in each of the next 38 stitches. Work 1 double crochet in the chain-1 space (mark this stitch). Chain 1 and skip the next 24 stitches, fold the piece in half again and work 1 double crochet in the next chain-1 space (mark this stitch). This space will become your second armhole. Work 1 double crochet in each of the remaining 19 stitches.
Step 12: Chain 3 and turn. Work 1 double crochet in each of the next 19 stitches. Work 1 double crochet in the chain-1 space. Work 1 double crochet in each of the next 40 stitches. Work 1 double crochet in the chain-1 space. Work 1 double crochet in each of the remaining 20 stitches. Change to Color A. You should have 82 double crochets.
Continue working rows 13-24 as specified in the pattern, working 1 double crochet in each stitch across (82 double crochets) and changing colors as desired. After row 24, fasten off.
Adding the Sleeves
Step 1: Place stitch markers in the first foundation double crochet row. Attach yarn to the chain in the center under the arm. Chain 3 (counts as first double crochet). Work a double crochet two together using the marked stitch and the next double crochet. Work 1 double crochet in each of the next 23 double crochets. Work a double crochet two together using the next double crochet and the marked stitch. Slip stitch into the top of the Chain 3 to join the round. You should have 25 stitches.
Step 2: Chain 3 (counts as first double crochet). Work 1 double crochet in each double crochet around. You should have 25 stitches.
Step 3: Repeat the previous row for 10 more rows, following the color changes of the body of the sweater. You should maintain 25 stitches.
Continue with steps 4-7 to complete the sleeve, gradually decreasing the stitch count and finishing with single crochet and slip stitch rounds. Repeat the entire sleeve process for the second arm.
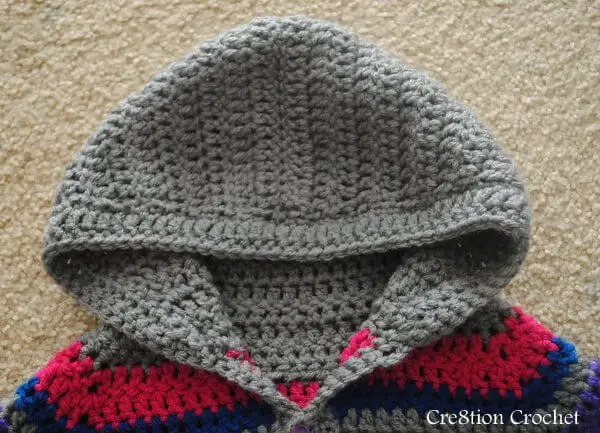
Creating the Hood
Step 1: With the sweater facing you, attach Color A yarn at the top left-hand corner. Chain 3 and work 1 double crochet in the same stitch. Work 1 double crochet in each of the next 6 stitches. Work a double crochet two together 3 times. Work 1 double crochet in the next stitch. Work a double crochet two together 3 times. Work 1 double crochet in each of the next 16 stitches. Work a double crochet two together 3 times. Work 1 double crochet in the next stitch. Work a double crochet two together 3 times. Work 1 double crochet in each of the remaining 7 stitches. You should have 45 stitches.
Continue with steps 2-19 to complete the hood, following the pattern’s instructions for increases and decreases. Mark specific rows with stitch markers as indicated for later finishing.
Finishing the Sweater
Step 1: Fold the hood in half towards the back. Turn the entire piece around and line up the edges. You can either slip stitch or whip stitch to close off the center fold. Fasten off and weave in the tail.
Step 2: For the edging, start in the space where you began the hood. Insert your needle in the ridge where the first row of the hood meets the body of the sweater, at the first stitch marker.
Step 3: Attach Color A and work single crochet around the entire hood and body of the sweater. To space evenly, place 1 single crochet in the ridge of every row and 1 single crochet in the center of the chain in every row. Place 3 single crochets in both front corners of the sweater. Slip stitch to join.
Step 4: Work 1 half double crochet in the next stitch (at the first set of stitch markers). Work 1 double crochet in every stitch around the hood. When you get to your stitch markers at rows 3, 6, 9, 12 on either side, and when you get to the top (ridge) of the hood, work a double crochet two together. Work 1 half double crochet in the last stitch of the hood (where you placed your first set of stitch markers).
To create the first button hole: Work 1 single crochet in the next stitch. Chain 3. Work 1 single crochet in the next stitch. This first button hole should line up with the bottom ridge of the Color A row, where it meets the Color B row.
Continue to work single crochet around the body of the sweater, placing button holes at the bottom of every Color A (grey) row using the same method: [1 single crochet in the next stitch, chain 3, 1 single crochet in next stitch]. Work 3 single crochets in both front corners of the sweater. Slip stitch to join the row.
Step 5: Work 1 single crochet in every stitch around the hood. Where the hood meets the body of the sweater, fasten off and weave in ends. Finish weaving in all tails.
Step 6: Sew buttons to coordinate with the button holes. They should be placed in line with the bottom of where Color A meets the next color for added security.
Important Notes and Tips
- The chain 3 will count as your first double crochet in each row. The next double crochet should be placed in the second stitch. For the hood, the chain 3 still counts as the first double crochet BUT you will place the next double crochet in the same stitch.
- Pay close attention to the parts of the directions that require stitch markers. This is important so that you can properly line up the hood and the button holes.
- For a neater finished look, weave in the tails from color changes rather than stitching over them.
- The hood will be stitched around 3 times during finishing, while the body will only be stitched around 2 times.
Caring for Your Finished Sweater
This sweater can be machine washed on gentle cycle, or follow the washing instructions for the specific yarn you choose. Proper care will ensure your handmade creation lasts through multiple wearings and can even be passed down to younger siblings or friends.
Customization Ideas
One of the best things about this pattern is how easily it can be customized:
- Color variations: Create your own stripe pattern or use a single color for a more classic look
- Button choices: Select buttons that complement your yarn colors or add a whimsical touch with novelty buttons
- Add appliqués: Consider adding crocheted appliqués like flowers, stars, or animals to personalize the sweater
- Edging variations: Experiment with different edging stitches for a unique finish
Conclusion
This toddler striped sweater truly lives up to its name as “the simplest” sweater pattern. With its straightforward construction, beginner-friendly techniques, and adorable finished look, it’s a perfect project for crocheters of all skill levels.
The versatility of this pattern makes it a great addition to any toddler’s wardrobe. It’s warm enough for cooler days but not too bulky, and the button-up front makes it easy to put on and take off—a feature both parents and toddlers will appreciate!
If you’re new to crocheting garments, this pattern provides an excellent introduction to the basic techniques you’ll need for more complex projects in the future. And if you’re an experienced crocheter looking for a quick, satisfying project, you’ll appreciate the simplicity and effectiveness of this design.
Happy crocheting!
